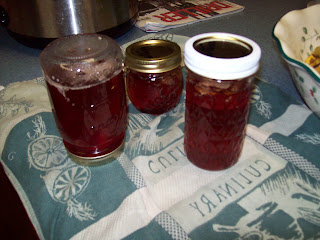
Im my previous post I talked about some of the great varieties of apple that wil thrive in Alaska and preserving the harvesting heritage. Now we're going to talk about some of the great things you can do with these apples! Crabapple jelly is by far one of the favorite uses of crabapples here at Wicked Raven. The jelly is a clear rosy color and has enough natural pectin that none has to be added and it still makes a "stacking" jam! That means that you can stack it up on whatever you're making and it stays there! It makes a great gift jelly in a pretty jar with a bread mix (Ill help you with that one in a later post).
The juicing process takes just about all day with a stove top juicer and Im sure you could speed it up somehow but I like having the process going on in the kitchen while I sew, clean, prep menus, or any number of other things that two job hockey mom hobby farmers never seem to catch up on. It also makes your house smell great! Whats not to love.
This batch of apples (about 3 gallons whole) produced about 16 cups of juice and I used all but four of that to make jelly. The other four cups we added one cup of sugar (you could probably use less or use liquid stevia too), chilled it for about two hours and the kids drank it with dinner! So good and so full of natural vitamins.
Best Crabapple Jelly
4 Cups Crabapple juice
4 Cups Sugar
1 tsp. cinnamon (optional)
Using a large saucepot, bring all ingredients to a boil over high heat stirring constantly. Cook to gelling point (when you drip some on the spoon rest, then tip the rest it moves slowly or not at all). Skim foam if necessary and ladle into hot jars leaving 1/4 inch of space. Place two-piece caps on and process in a hot water bath for ten minutes or use the quick turn method to seal. (see below for directions)
Starting the Crabapple Jelly
The quick turn method to seal jars is a simple way to seal your jelly without a water bath. You cannot use this method for everything - I only use this for jelly.
Once your hot jelly is in the hot jars, adjust the two piece caps and tighten them down. Turn the closed jars upside down and set your timer for five minutes.
When the five minutes is up turn the jars right side up using a quick turn or flip.
Let jars sit and you will soon begin to hear them seal - some go fast and some go slow but I have never had a jar not seal unless I had a glob of jelly on the rim that I missed wiping off! Good eating!
This is a great way to keep your jars hot while your product finishes. Put the clean jars in the oven on warm while you finish the product and you won't have to worry about them being hot enough!
Blessed Be and Happy Harvest Time!
Tune in to the next post for Easy Spiced Apples!


